- How To Paint Trees In Watercolor In 4 Easy Steps
- Tree Structure
- Cast Shadows
- Useful Watercolor Brushes For Painting Trees
- Mistakes To Avoid When Painting Trees
- Trying To Paint Every Individual Leaf
- Only Using One Or Two Shades Of Green
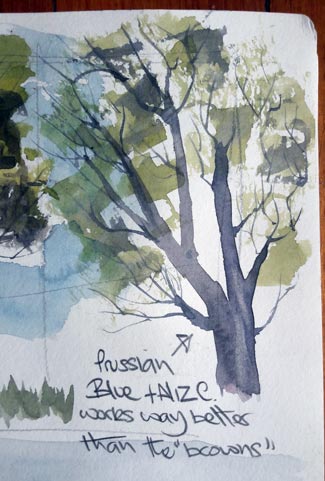
- Making All Your Tree Trunks Dark Brown
- Branches At Random Angles
- Making A Branch Thicker Than The One It Stemmed From
- Making A Tree Too Symmetrical
- Painting "Flat" Looking Trees
- Making The Trunk Too Straight
- Bad Perspective & Tapering Trees
- How To Mix Realistic Colors For Painting Trees
How To Paint Trees In Watercolor In 4 Easy Steps
Trees were probably one of the first things you painted as a kid. Maybe your mother or a classmate showed you how to do it. They painted a thick brown line with a green circle on top and you faithfully copied it. Those “Lollipop” trees we used to paint were a useful symbol that served us well and many of us never progressed from there. Let’s lose that tired old symbol and learn how to paint a simple tree in watercolor.

Total Time Needed :
10
Minutes
Equipment:
Paints
Painting A Watercolor Tree Step By Step:
Step 1: Sketch the outline of the tree

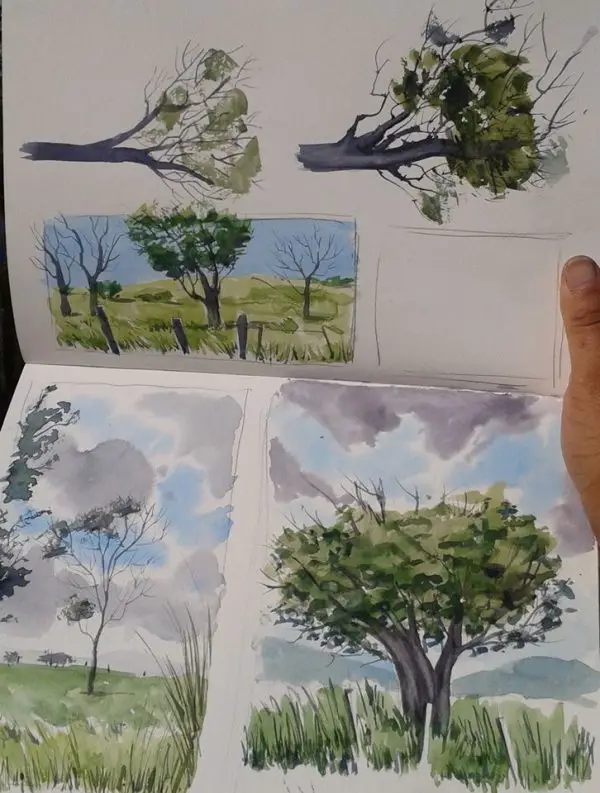
Tree branches often tend to fan out in a way that roughly resembles the outline of an umbrella, so start by sketching the overall shape formed by the canopy of the foliage, the draw in the central line of the trunk. Sketch the main branches coming off the trunk and subdividing out into smaller branches.
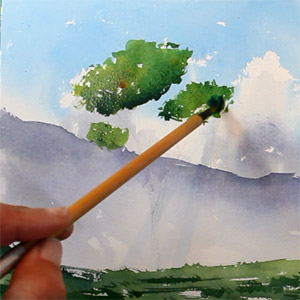
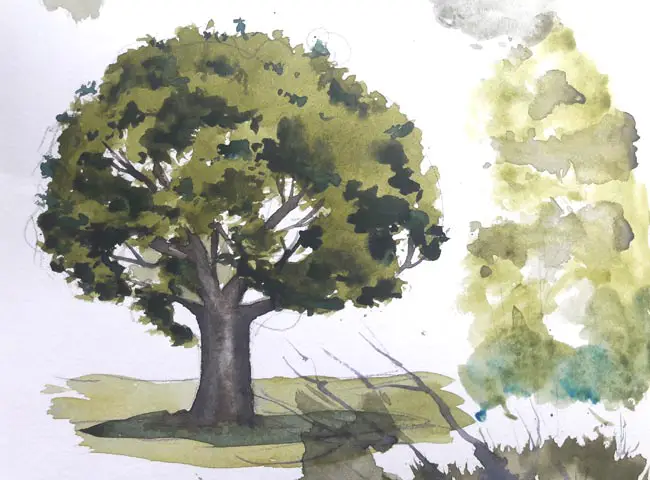
Step 2: Paint the leaves first
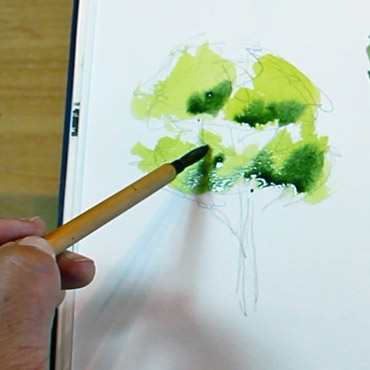
Due to watercolor’s transparent nature, you can’t paint light leaves over the top of a dark trunk. So you will find that you get a more convincing result if you paint the foliage shapes first and paint in the trunk and branches after, in the places where they would show through the foliage.
Foliage is more dense in some areas than others leaving areas for the sky and branches to show through “Sky holes” is a good idea.
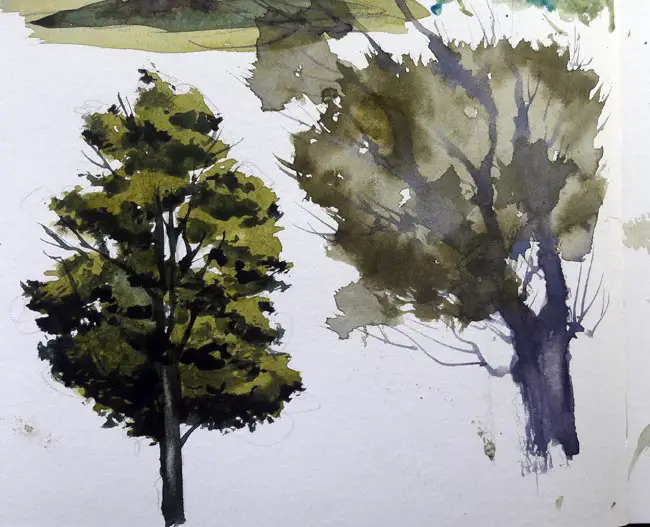
Mix a warm natural looking green from New Gamboge and Ultramarine Blue and paint some foliage shapes leaving some white space between them. Create a darker green by adding more Ultramarine to the mix and drop this color in at the base of your foliage shapes to create shadow.
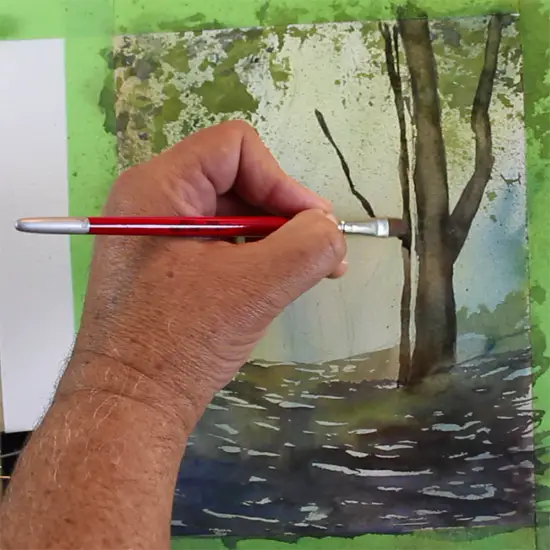
Step 3: Paint the thickest part of the trunk
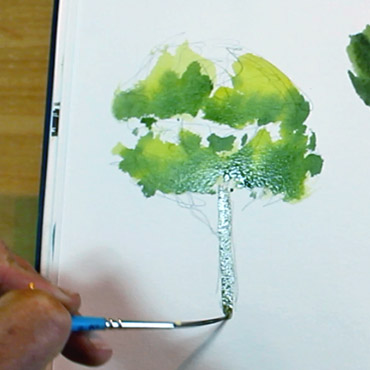
Paint the trunk by placing your brush at the bottom of the foliage you have just painted “Pull” it down to the ground with your brush.
I’ve used a rigger in this painting, depending on the size and shape of the trunk, a thicker round brush, or the edge of a flat brush may be more appropriate.
Step 4: Paint the thin branches
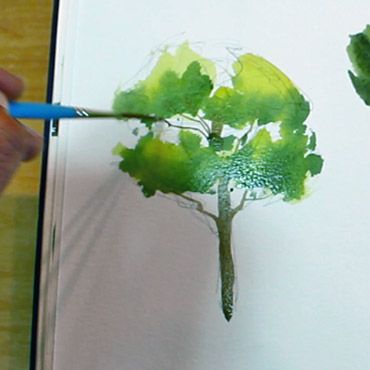
Depending on the brush you are using you may want to switch to a thin brush, such as a rigger and flick the branches from the trunk outwards to meet the foliage.
Remember: In general individual branches do not taper. Trunks and branches tend to stay fairly uniform in thickness along their length until they reach a branching point and split into thinner branches of uniform thickness and so on.
Tree Structure
To understand human anatomy, artists study the skeleton. Likewise, to understand trees let’s look at the structure of the trunk and branches first.
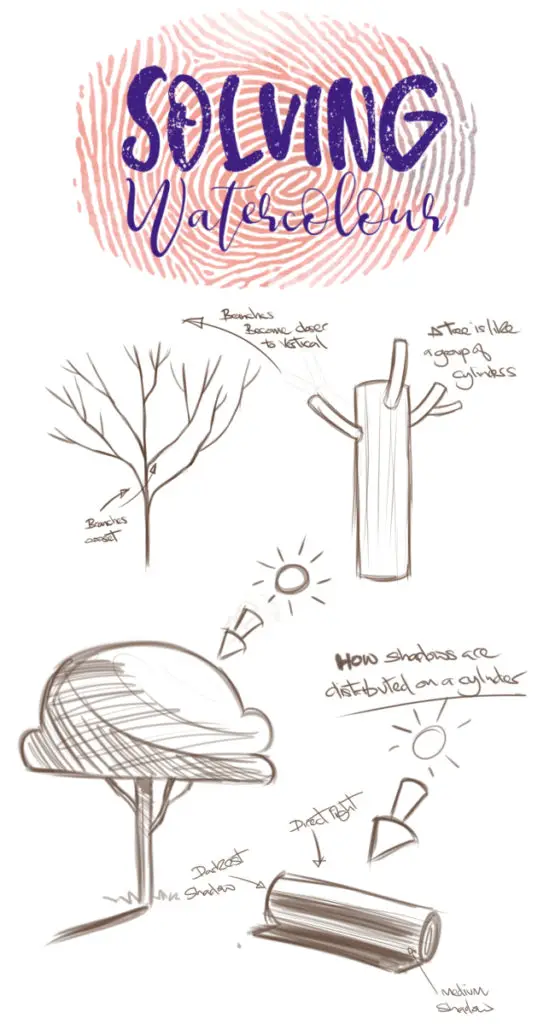
Let’s break it down into it’s simplest abstract form. A trunk is basically a large cylinder. The branches can also be thought of as cylinders that radiate out from the central cylinder of the trunk. The branches also have smaller cylinders radiating out from them in a predictable sequence. This is known as the Fibonacci sequence but it’s beyond the scope of this post to go into that here.
So we’re back to symbols again but let’s think terms of three dimensions instead of just two.
Once the basic form of a tree is understood as a series of interlocking cylinders. You can understand how light falls onto a cylindrical object, then by knowing where your light source is coming from, shading becomes predictable and consistent.
See the pic below for an illustration of this.
Cast Shadows
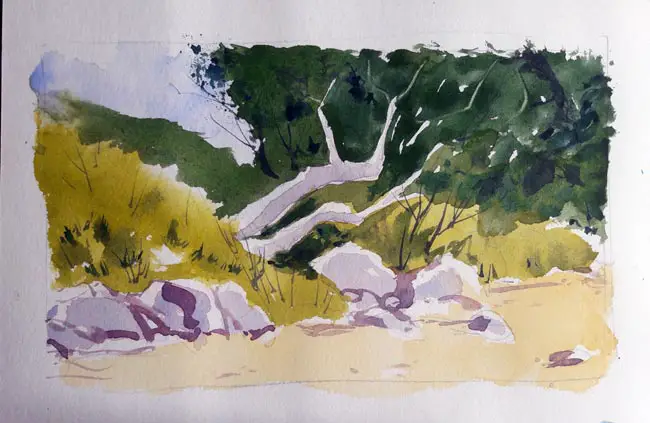
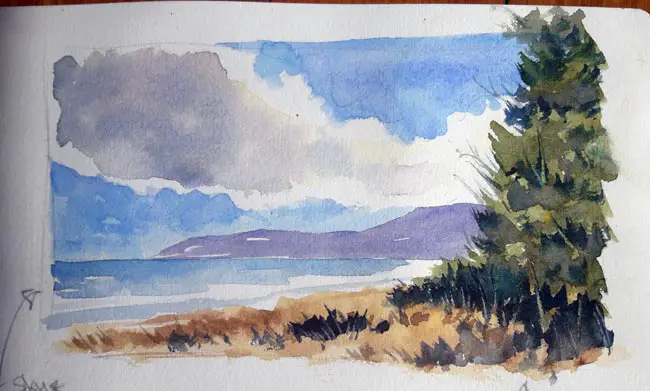
Cast shadows tend to be darker than shadows on the object itself and the edges of cast shadows tend to be hard and distinct. Shadows tend towards the cooler side of the color wheel , blues and purples and cool neutrals. Remember also that the trees leaves and branches also cast shadows on the tree itself. These details will make your tree paintings much more convincing.

Useful Watercolor Brushes For Painting Trees
Hake Brushes
The Hake brush is an Asian style brush, popularized by the artist Ron Ranson. The soft flexible hair of Hake Brushes work well for creating natural looking foliage.

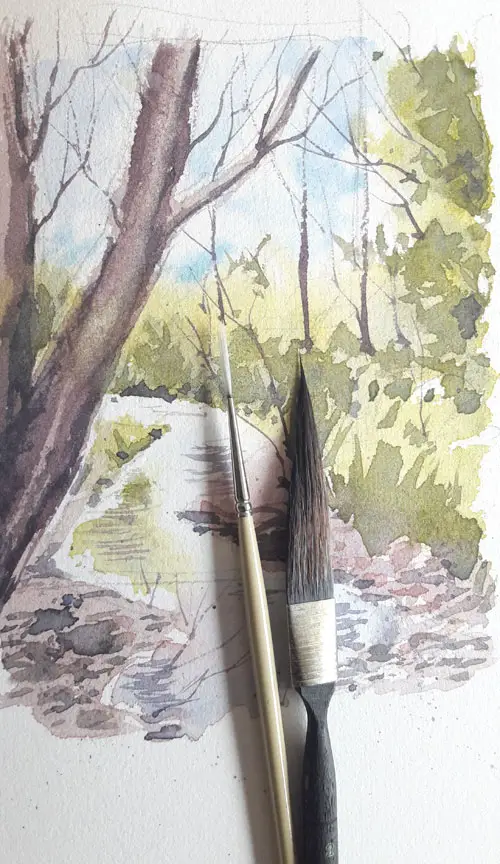
Swordliner, Dagger Brushes, and Riggers
These are all brushes specifically designed for painting very thin lines. Therefore you can use any of these for painting delicate tree branches
Round Brush
This is a versatile brush that can be used for painting trunks, and branches. Held horizontally to the paper and dragged on the paper, it can be used for foliage. Held horizontally and dragged across can create interesting bark textures. This can be done with minimal paint in the dry brush technique or wet depending on the effect you want to achieve.
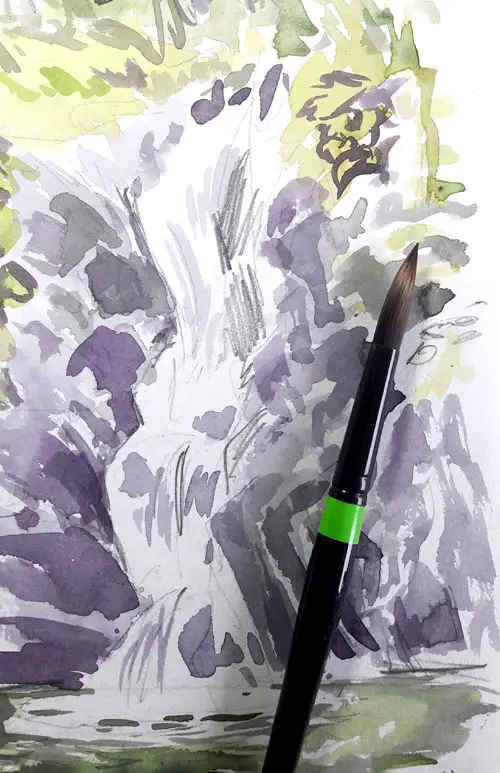
Bamboo Brush
Bamboo brushes are very cheap floppy natural hair brushes. The way the hairs splay out are great for creating a lively natural looking foliage.
Flat Brush
Flat brushes work well for painting bold thick tree trunks. They are also perfect for lifting out highlights from the trunk.
Palette Knife
I tend to use a combination of painting around the thicker branches and scratching out the thinner branches with a palette knife. This works best when you apply the paint in thick creamy consistency. Scratching out from a very thin wash tends to have the opposite effect leaving a dark line. You could just cheat and use an opaque white. Of course there’s no such thing as cheating. I just personally prefer the look of white paper showing through rather than using opaque whites
Any old or tatty brush that refuses to form a nice point anymore can be put to use as a natural foliage brush. That’s why I never throw any brush away no matter what condition it’s in.
Plastic Wrap
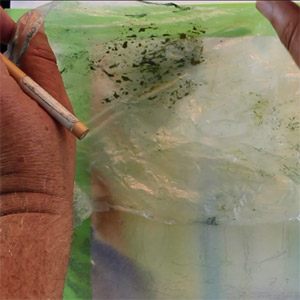
Using plastic wrap to create leaf textures is a trick I copied from artist Kanta Harusaki
If you need some help trying to select appropriate art supplies for your needs I’ve put together a list of my recommended art supplies.
Mistakes To Avoid When Painting Trees
Trying To Paint Every Individual Leaf
Trying to paint every individual leaf is frustrating and pointless. To overcome the temptation to do this squint at the tree (Or tree reference image) until you only see large blurred areas of color. While you don’t need to define every single leaf you can certainly add some leaf detail in various places.
Only Using One Or Two Shades Of Green
I’ll go into more detail on mixing natural greens later in this post but think in terms of 3 – 4 greens per tree a light, a mid and a dark, and possibly another very dark for the deepest shadows. This will enable you to convey the full range of tones. Observe the range of greens, are they light or dark, cool or warm. There is such vast array of greens in nature.
Making All Your Tree Trunks Dark Brown
This assumption that trees are this color goes back to that tree symbol you learned as a child. Really look at tree trunks and you’ll realize that they are almost never this color. Warm or cool neutrals are usually much closer to reality than those chocolatey earth colors that you’ve always automatically used. I’ll show give you some palette suggestions at the end of this post
Branches At Random Angles
The angle of Tree branches tend to be widest from the vertical at the lower branches with the angle becoming more and more acute as you go upwards until they are almost pointing straight up. This is quite a broad generalisation as it does also depend on the species of tree. As always observation is the key. Certain varieties of Pine Trees can have branches that tend to be roughly horizontal, or close to horizontal. Also, weathering, gravity and age can cause branches to twist and turn in all sorts of directions but as a general rule it’s worth bearing in mind that a tree’s branches don’t tend to point in random directions. Yet they are often drawn that way. A strange looking tree in a photograph is believable but a strange looking tree in a painting is more likely to be interpreted by the viewer as a badly painted tree.
Making A Branch Thicker Than The One It Stemmed From
Again, weird anomalies and exotic varieties aside, branches tend to be noticeably thinner than the branches that they stem from. It will just look wrong if there is a thick branch stemming from a thinner one in your painting. Someone may not even consciously know why it looks wrong but they will feel it on a subconscious level.
Making A Tree Too Symmetrical
Unless it’s an ornamental tree, trees tend to be asymmetrical. Branches tend not to mirror each other but are usually offset. They do have an overall balance though. Unless they are growing in the path of a strong prevailing wind. In which case, other surrounding trees will tend to have the same bent over look.
Painting “Flat” Looking Trees
Always try and think in 3d. Remember that a tree’s branches point towards and away from the observer. They don’t just sprout from the sides. The foliage forms a canopy, so be aware of how the light and the shadows combine to give a sense of three dimensionality.

Making The Trunk Too Straight
Notice how a tree trunk flares at the base where the roots appear. There may be kinks and twists in a trunk depending on it’s age and species.
Bad Perspective & Tapering Trees
I’ve seen trees drawn that look like isosceles triangles. This is usually done in an attempt to try and introduce perspective. Perspective drawing is beyond the scope of this post. But suffice it to say that you would need to have a viewpoint from the very base of a very tall tree looking directly up to the top before any significant perspective effect would become noticeable.
How To Mix Realistic Colors For Painting Trees
Try and observe trees in nature as much as possible. There are an incredible range of greens in tree foliage. It may help you too think in terms of warm greens (Leaning towards brown) and cool greens (Leaning towards blue).
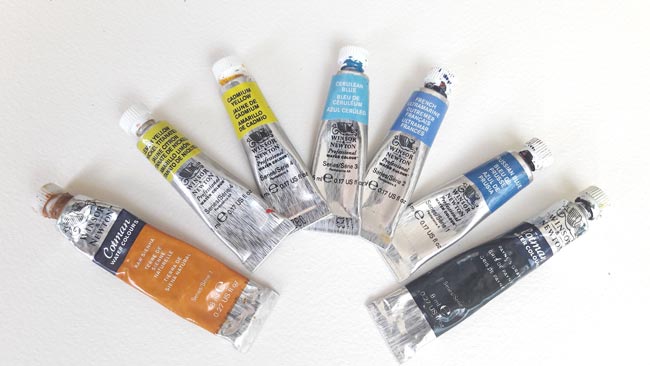
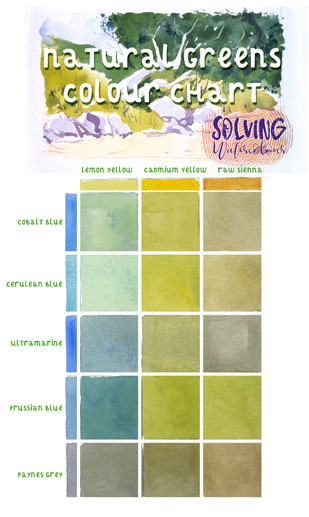
Below is a color chart that you can use for creating natural looking greens. These were created with Winsor and Newton artist series and the Cotman range. These are Lemon Yellow, Cadmium Yellow, Cerulean Blue, Cobalt Blue, Ultramarine Blue, Prussian Blue, Paynes Gray, and Raw Sienna. Other brands with the same name may vary somewhat in the pigment. Use the chart below as a starting point for your own experimentation.
Personally, I like to mix my own greens rather than buy pre-mixed greens. The advantage of mixing your own greens is that they will have a consistency that will be missing from an “Off the shelf” approach. Pre – mixed greens often tend to be rather unnatural looking for some reason but if you do want to use them, be prepared to calm them down a bit by mixing in a bit of complementary red, earth colors or a neutral tint. As a general rule you will need a light, medium and a dark green to create the full range of foliage tones.
Bark Texture And Colors
As with foliage, bark isn’t just one color. Again, observation is key but bark can range from pale gray through greens, to warm neutrals and including reds blues and purples.
If you’d like to learn more about painting trees and landscape painting check out my online course Successful Watercolour Landscapes
Related Post: How To Mix Perfect Greens in Watercolor
Related Post: Paint A Vivid Forest Watercolor Scene
Related Post: How To Paint A Glowing Autumn Watercolor Landscape


Very informative